Automatic Modification
We may want to apply certain modifications to all outgoing HTTP requests or all incoming HTTP responses in certain situations. In these cases, we can utilize automatic modifications based on rules we set, so the web proxy tools will automatically apply them.
Automatic Request Modification
Let us start with an example of automatic request modification. We can choose to match any text within our requests, either in the request header or request body, and then replace them with different text. For the sake of demonstration, let's replace our User-Agent with HackTheBox Agent 1.0, which may be handy in cases where we may be dealing with filters that block certain User-Agents.
Burp Match and Replace
We can go to (Proxy>Options>Match and Replace) and click on Add in Burp. As the below screenshot shows, we will set the following options:
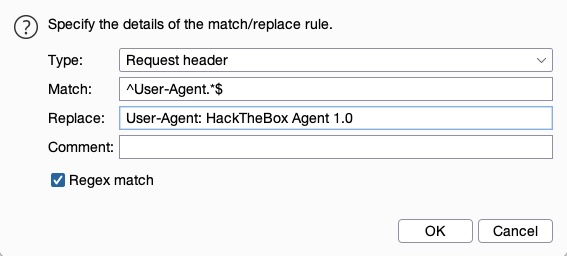
:
| Since the change we want to make will be in the request header and not in its body. |
:
| The regex pattern that matches the entire line with
in it. |
:
| This is the value that will replace the line we matched above. |
: True | We don't know the exact User-Agent string we want to replace, so we'll use regex to match any value that matches the pattern we specified above. |
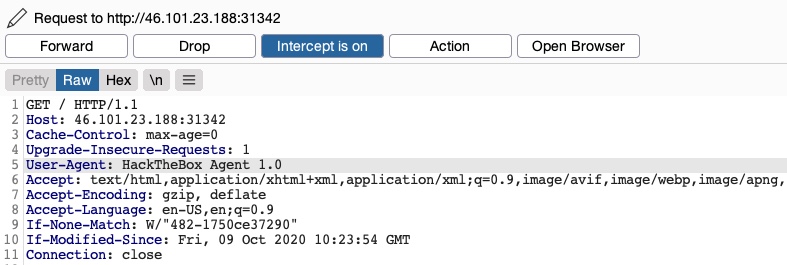
Once we enter the above options and click Ok, our new Match and Replace option will be added and enabled and will start automatically replacing the User-Agent header in our requests with our new User-Agent. We can verify that by visiting any website using the pre-configured Burp browser and reviewing the intercepted request. We will see that our User-Agent has indeed been automatically replaced:
ZAP Replacer
ZAP has a similar feature called Replacer, which we can access by pressing [CTRL+R] or clicking on Replacer in ZAP's options menu. It is fairly similar to what we did above, so we can click on Add and add the same options we used earlier:
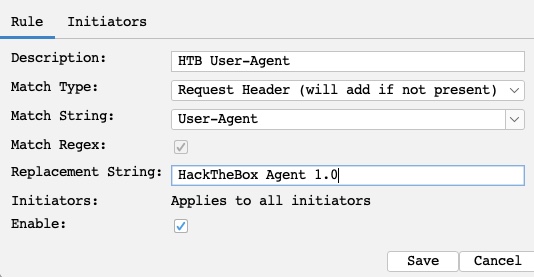
Description:HTB User-Agent.Match Type:Request Header (will add if not present).Match String:User-Agent. We can select the header we want from the drop-down menu, and ZAP will replace its value.Replacement String:HackTheBox Agent 1.0.Enable: True.
ZAP also has the Request Header String that we can use with a Regex pattern. Try using this option with the same values we used for Burp to see how it works.
ZAP also provides the option to set the Initiators, which we can access by clicking on the other tab in the windows shown above. Initiators enable us to select where our Replacer option will be applied. We will keep the default option of Apply to all HTTP(S) messages to apply everywhere.
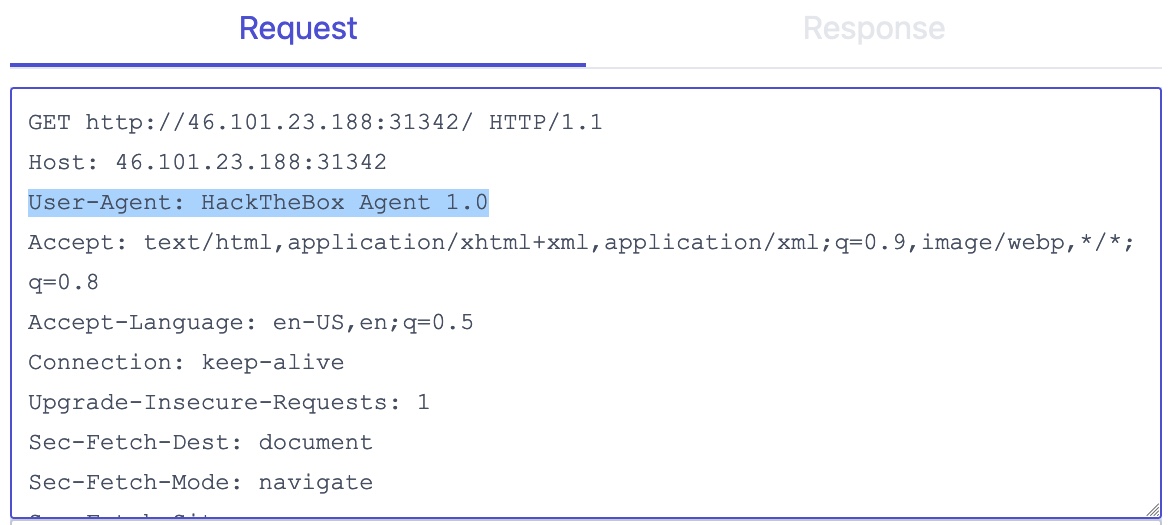
We can now enable request interception by pressing [CTRL+B], then can visit any page in the pre-configured ZAP browser:
Automatic Response Modification
The same concept can be used with HTTP responses as well. In the previous section, you may have noticed when we intercepted the response that the modifications we made to the IP field were temporary and were not applied when we refreshed the page unless we intercepted the response and added them again. To solve this, we can automate response modification similarly to what we did above to automatically enable any characters in the IP field for easier command injection.
Let us go back to (Proxy>Options>Match and Replace) in Burp to add another rule. This time we will use the type of Response body since the change we want to make exists in the response's body and not in its headers. In this case, we do not have to use regex as we know the exact string we want to replace, though it is possible to use regex to do the same thing if we prefer.
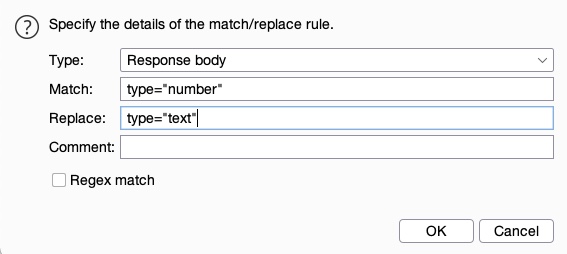
Type:Response body.Match:type="number".Replace:type="text".Regex match: False.
Try adding another rule to change maxlength="3" to maxlength="100".
Now, once we refresh the page with [CTRL+SHIFT+R], we'll see that we can add any input to the input field, and this should persist between page refreshes as well:

We can now click on Ping, and our command injection should work without intercepting and modifying the request.
Exercise 1: Try applying the same rules with ZAP Replacer. You can click on the tab below to show the correct options.
Exercise 2: Try adding a rule that automatically adds ;ls; when we click on Ping, by matching and replace the request body of the Ping request.